Generate Documents using Document Templates
You can generate Word, Excel or PDF files from document templates that contain entity-sourced dynamic data.
To generate documents using document templates, follow these steps:
Step 1. Create the document template
Prerequisite
- Before creating templates, you need to define the entities from which the Document_Generator connector will merge entity-sourced dynamic data. If you want to dynamic generate a table, which contains records from a collection, make sure that on your parent entity there is a field of type Entity List, which references a collection entity.
Which type of document template should you be using?
If you need a document, which returns records from a collection and perform calculations based on specific formulas, than the Excel template is the right answer; otherwise, use Word templates.
How document generation works
When the AI Agent executes a flows step that has the action defined by the AI Agent author for document generation, the Document_Generator connector app fills in the document template mentioned in the integration task with entity-sourced dynamic data and returns the output in the format/extension provided the integration task (either Word (doc, docx), Excel (xls, xlsx) or user-friendly PDF).
How to create a document template
On your local computer, create the document template (word or excel) that best suits your needs following the appropriate instructions: Creating Word Document Templates or Creating Excel Templates.
Step 2. Upload document
After you successfully created the document templates on your local computer, in the Druid Portal, select the AI Agent and solution and on the solution menu, click Documents. Documents is DRUID storage for Word, Excel and PDF files.
At the top-right corner of the page, click the Create New Template button. The Create or update document page appears. Click on General.
Enter a Name and Category for the file to upload, then browse for the document template (either Word or Excel) and select it.
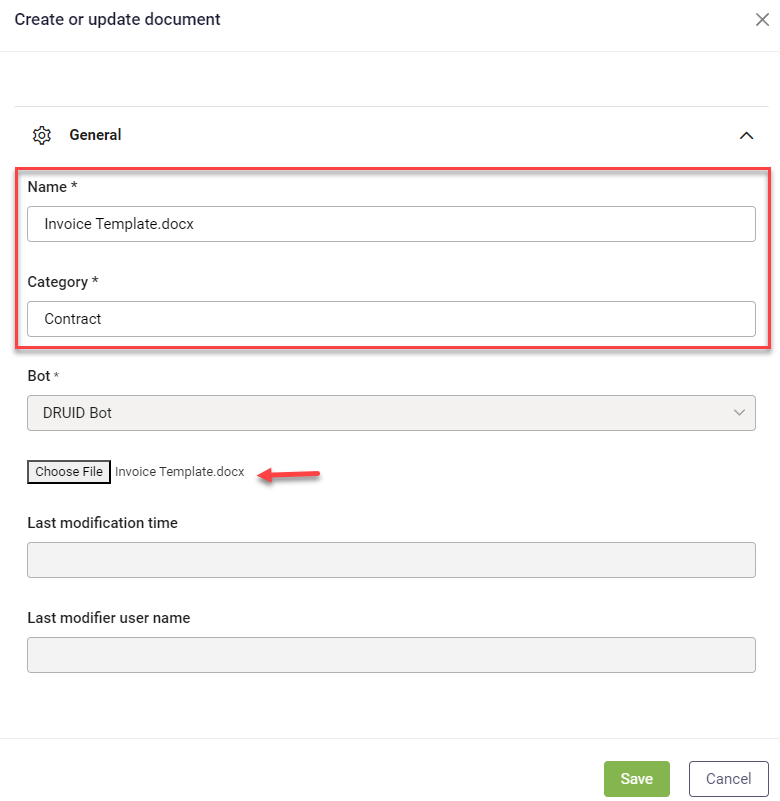
Click Save.
Step 3. Generate document
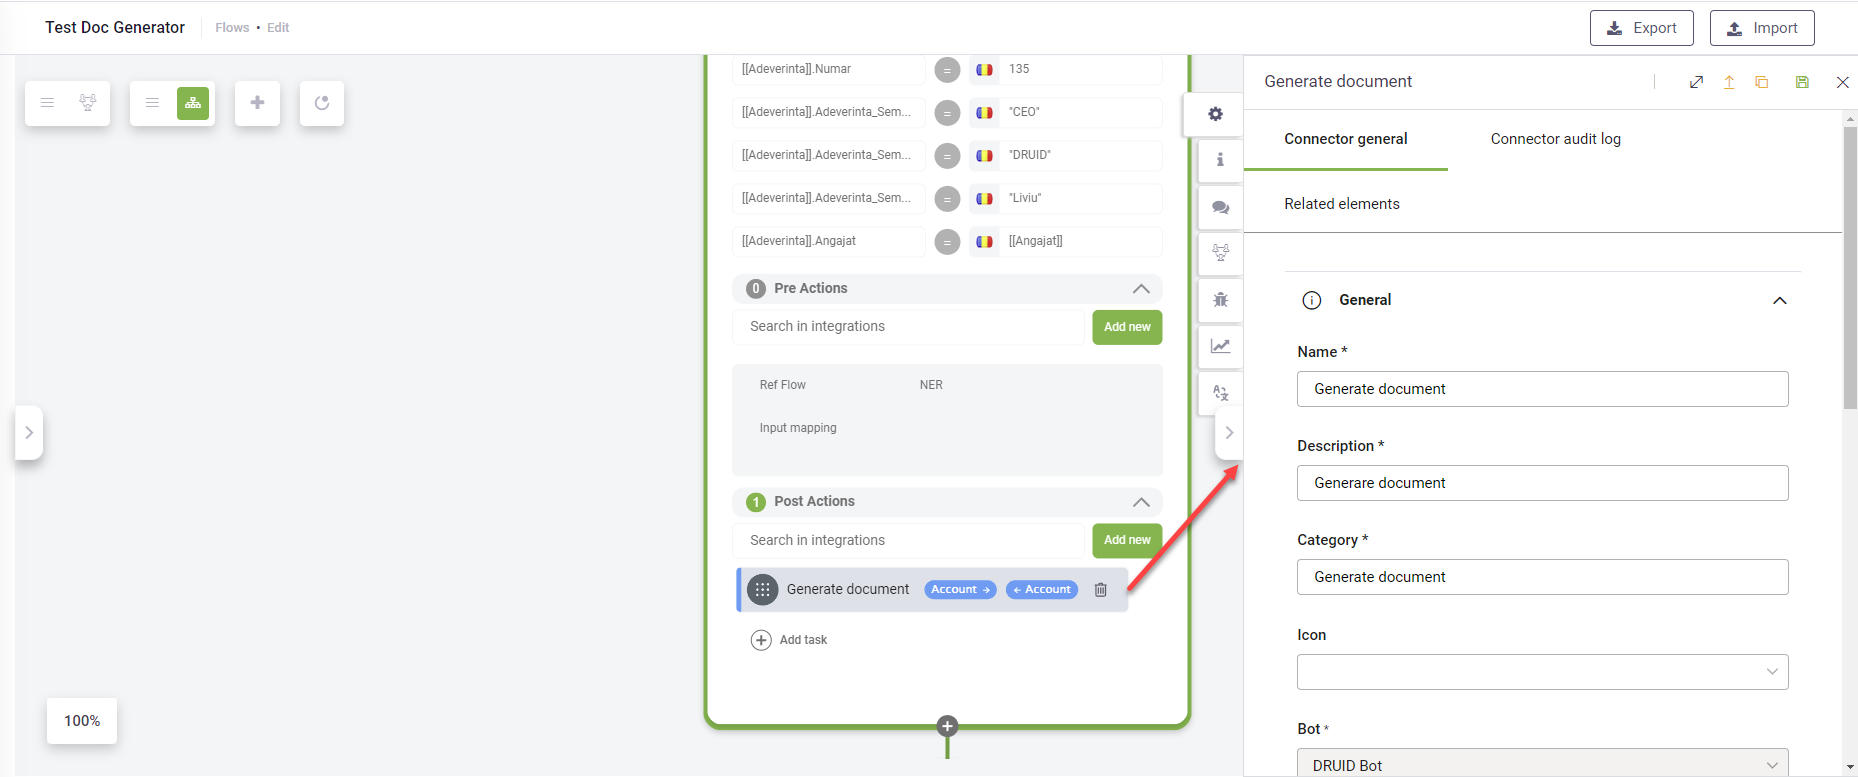
On the desired flow step, in the PostAction section, add a connection action and provide the following details:
|
Parameter |
Description |
|---|---|
|
Name |
The name of the action. The field is mandatory. |
|
Description |
A brief description of the action that might be useful for other tenant admins. The field is mandatory. |
|
Category |
Define on the spot when creating the action. Useful to easily find the actions in the Integrations list. The field is mandatory. |
| Icon |
Select the icon that best describes the integration. It helps you easily identify the integration action in the list of integrations. If no icon is selected, DRUID will show default icon. |
|
Request Entity Name |
The entity used by the AI Agent to send data to the external app via the current action. |
|
Response Entity Name |
The entity used by the AI Agent to receive data from the external app via the current action. |
|
Is Active |
Tick to activate the connector action. |
Click Save.
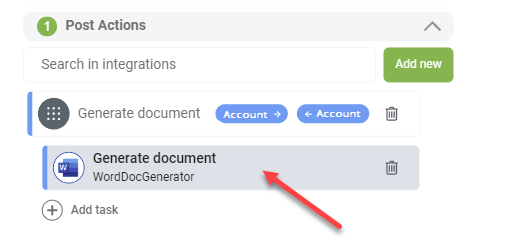
Add a Document Generator specific task that suits your document template (Word or Excel).
Click on the integration task and in the right-side editor provide the details described in the table below.
|
Field |
Description |
|---|---|
|
Description |
Enter a brief description for the task. E.g., Invoice Generation. |
| Use Dynamic Template Name |
Use dynamic template to specify the document template to be used from a DRUID entity field, instead of a fixed template, e.g., [[Employee]].TemplateName. If you tap on this option, the DocTemplateName will be replaced by the Dynamic Template Name field. For more information, see Generate Documents with Dynamic Templates. |
|
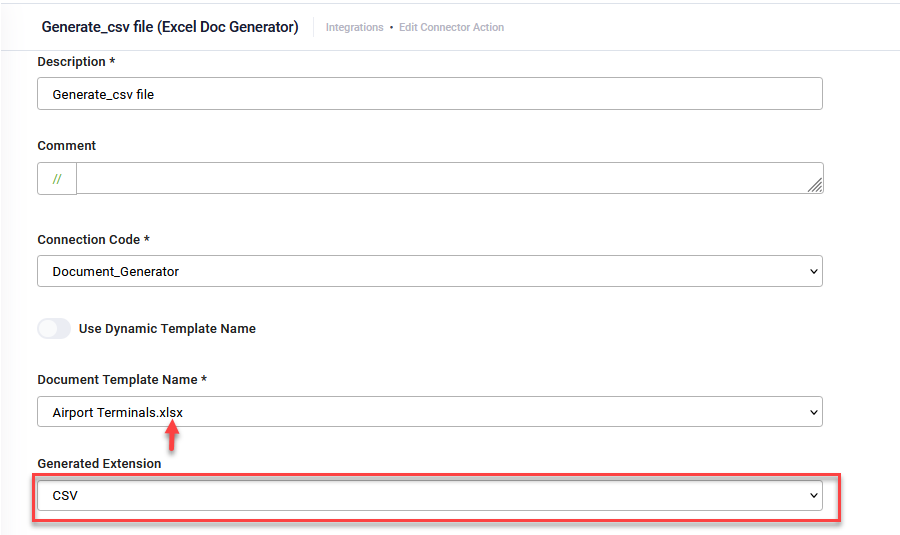
Document Template Name |
Select the template you uploaded to Documents. |
|
Generated Extension |
The extension of the output document. If the task you selected is of type Word Document Generator, the following options are available: doc, docx, pdf. If the task you selected is of type Excel Document Generator, the following options are available: xls, xlsx, pdf and csv. NOTE: Generating CSV documents is available in DRUID 8.1 and later, but only when using an XLSX document template.
|
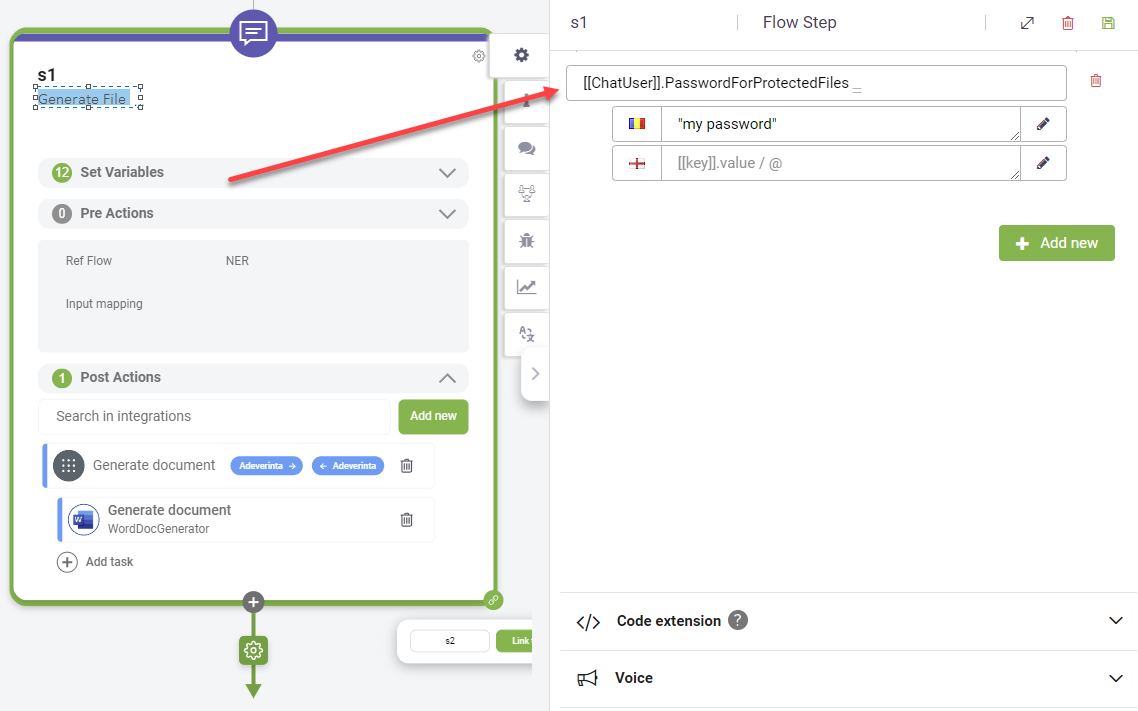
| Password Protected |
NOTE: This setting is available only if the Generated Extension is set to PDF.
Tick on PasswordProtected to password protect a pdf output document. On the flow that generates the PDF document, before calling the DocumentGenerator connector, make sure to set the password value in field [[ChatUser]].PasswordForProtectedFiles in the Set Variables section.
IMPORTANT! If you're using [[ChatUser]] as request and response entity on the connector, the password will be saved in clear in the conversation history.
|
| Add PDF Attachments |
Allows you to generate a PDF with specified attachments using the PDF Attachments field. To add a single attachment, specify an entity field that references the [[File]] entity. To include multiple attachments, specify an entity list field that references the [[File]] entity. NOTE: This feature is available in DRUID 8.6 onwards.
|
| Dynamic File Name |
NOTE: This option is available in DRUID 5.14 and higher.
Specify the file name of the generated document either hard coded (e.g., "Invoice April") or as a value from the context: an entity field (e.g., [[Employee]].Name) or a local variable. If the field is empty, DRUID will use the template file name as file name of the generated document. |
| ProjectResultToEntityPath | Select the entity field (a field of type file created on the request entity) that will store the generated document. |
Click the Save icon ( ), then the Publish icon (
 ) at the top of the right-side editor.